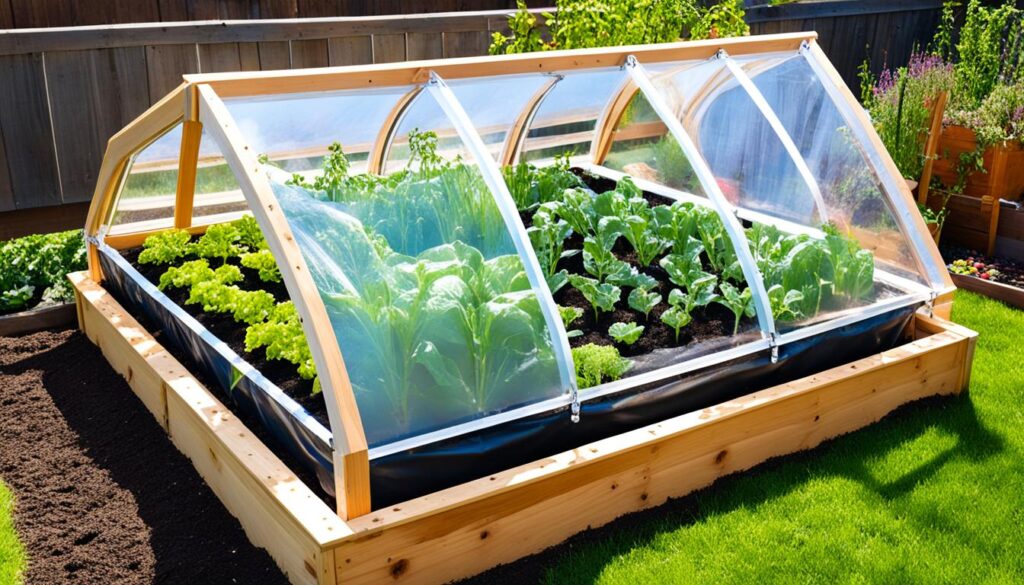
Making a pallet planter is a fun and easy DIY project that can transform your outdoor space. With just a pallet or two and a few hours of work, you can create a three-tier, wall-mounted planter for your trailing plants, flowers, or herbs. This step-by-step guide will walk you through the process of building your own pallet planter.
Key Takeaways
- Creating a pallet planter is a simple and cost-effective DIY project
- With a few materials and tools, you can build a three-tier, wall-mounted planter
- Prepare the pallet by repairing or replacing damaged boards and sanding the wood
- Build the planter boxes by adding additional slats and securing the pallet upright
- Fill the planter boxes with potting soil and add plants to create a beautiful display
Materials Needed
When it comes to creating your own pallet planter, you’ll need a few key materials to get started. Here’s a list of everything you’ll need:
| Materials | |
|---|---|
| 1 or 2 wood pallets | |
| Galvanized nails | |
| Staple gun | |
| Landscape fabric | |
| Potting soil | |
| Plants | |
| Sandpaper | |
| Tape measure | |
| Utility knife | |
| Hammer | |
| Drill (optional) | |
| Paint brush/roller (optional) | |
| 2 one-by-sixes, each 8-foot (optional) | |
| Paint or other coating (optional) | |
| One-by-fours (as needed) | |
| Pea gravel or drainage rocks (optional) |
With these materials in hand, you’ll be ready to tackle the pallet planter tutorial with ease. Let’s get started on creating your own beautiful pallet planter!
Preparing the Pallet
I begin the process of creating a stunning pallet planter by preparing the pallet itself. This step is vital to ensure stability and durability throughout the project. Here’s what I do:
- Repair or Replace: I carefully inspect the pallet for any damaged or missing top or bottom deck boards. If I find any, I either repair them or replace them with new ones. This ensures a solid foundation for the planter.
- Create Space: To allow proper drainage and plant growth, I occasionally remove some boards close together on the top deck. This creates space between the slats, ensuring ample room for plants to thrive.
- Nail and Align: Next, I turn the pallet vertically and insert the removed boards into the center, lining them up with the remaining slats on top. To secure the boards in place, I use galvanized nails and ensure they are firmly attached.
- Smooth and Finish: To create a polished look and prevent any potential splinters, I sand the entire surface of the pallet. This step also helps to remove any rough spots or imperfections. If desired, I consider staining or painting the pallet to match my outdoor aesthetic.
By following these simple steps, my pallet is now ready to be transformed into a beautiful planter, providing the perfect home for my favorite plants or flowers.
| Materials Needed for Preparing the Pallet: |
|---|
| • Pallet |
| • New top or bottom deck boards (if necessary) |
| • Galvanized nails |
| • Sandpaper |
| • Hammer |
| • Optional: Stain or paint |
In the next section, I’ll guide you through the process of building the planter boxes on the prepared pallet.
Building the Planter Boxes
Now that you have prepared the pallet, it’s time to build the planter boxes. Follow these easy pallet planter instructions:
- Lay the pallet down with the bottom facing up.
- Nail one more slat to the bottom of the pallet, lining it up with the sideways slat secured in the middle of the planter. This will form the backs of the individual planter boxes.
- If necessary, add back slats to the top and bottom planters as well.
- Stand the pallet upright and secure it against a wall or attach it to an exterior wall using screws.
- Alternatively, add wedges or stabilizers to the base to keep it upright if it will be standing on its own.
By following these pallet planter instructions, you will create sturdy planter boxes that can accommodate your favorite plants. The next step is to fill them with soil and plants to bring your pallet planter to life.
| Materials Needed | Tools Needed |
|---|---|
|
|
Adding Soil and Plants
Once the pallet planter is in position, it’s time to fill the planter boxes with potting soil. This will provide the necessary nutrients and support for your plants to grow and thrive.
I recommend using a high-quality potting soil that is well-draining and nutrient-rich. This will ensure that your plants receive the necessary moisture and nutrients while also preventing issues such as waterlogged roots.
Add a layer of potting soil to each planter box, starting with the bottom tier and working your way up. Gently pat down the soil to create an even surface.
If you want to add a decorative touch or enhance drainage, you can consider adding some pea gravel or drainage rocks at the bottom of each planter box. This will help improve water flow and prevent the soil from becoming compacted.
Choosing and Planting the Right Plants
Now that your pallet planter is filled with soil, it’s time to add the plants. Choose plants that are suitable for your specific growing conditions and desired aesthetic.
If you’re looking to add a splash of color, consider planting petunias or other flowering plants with vibrant blooms. These will add beauty and visual interest to your pallet planter.
For a cascading effect, opt for plants with trailing flowers or foliage. These will spill over the edges of the planter boxes, creating a stunning and dynamic display.
If you’re a fan of fresh herbs, why not plant some in your pallet planter? You can enjoy the convenience of having your herbs easily accessible, while also adding a delightful scent to your outdoor space.
Remember to consider the growth habits and requirements of the plants you choose. Ensure that they are compatible in terms of light, water, and temperature needs.
Once you’ve selected your plants, gently remove them from their pots and place them in the prepared planter boxes. Make sure to space them adequately to allow for healthy growth.
Care for the plants in your pallet planter the same way you would care for plants in any other pot or container. This includes regular watering, fertilizing as needed, and monitoring for pests or diseases.
| Example Plants for Pallet Planters | Light Requirements | Watering Needs |
|---|---|---|
| Petunias | Full sun to partial shade | Regular watering, allowing soil to dry slightly between waterings |
| Trailing Ivy | Partial shade to full shade | Regular watering, keeping the soil consistently moist |
| Thyme | Full sun to partial shade | Infrequent watering, allowing soil to dry out between waterings |
Adding Drainage and Rocks (Optional)
When it comes to creating a pallet planter, adding drainage is entirely up to you. You have a couple of options to consider. Firstly, you can adjust your watering schedule to prevent oversaturation of the soil. By monitoring the moisture level and watering only when necessary, you can avoid waterlogging the plants in your pallet planter.
Alternatively, you can add drainage holes to the planter boxes. Before adding the landscape fabric, drill small holes in the bottom of each planter box. These holes will allow excess water to drain out, preventing it from pooling and potentially damaging the plants.

If you choose to add drainage to your pallet planter, rocks can play a role in the process as well. Rocks at the bottom of the planter serve as a barrier between the soil and the drainage holes, preventing the soil from washing out of the holes while still allowing water to escape.
It’s important to note that adding rocks at the bottom of the planter is only necessary if you have drainage holes. If you opt for the watering schedule method, you can skip this step.
Summary:
| DRAINAGE OPTIONS | PROS | CONS |
|---|---|---|
| Adjust watering schedule | – Avoids oversaturation – No need for drainage holes |
– Requires monitoring moisture levels |
| Add drainage holes | – Allows excess water to drain – Prevents waterlogging |
– Requires drilling holes – May reduce soil volume |
| Add rocks at the bottom | – Provides a barrier for drainage holes | – Only necessary if using drainage holes |
Remember, the choice to add drainage or rocks to your pallet planter depends on your preferences and the specific needs of your plants. Whether you opt for the watering schedule method or choose to create drainage holes, your pallet planter is sure to thrive with proper care and attention.
Pallet Planter Longevity
As much as we love our pallet planters, it’s important to note that they have a limited lifespan. Typically, a wooden pallet planter can last anywhere between 3 to 5 years before it starts showing signs of rot and deterioration. To ensure that your pallet planter stands the test of time, here are a few tips to consider:
- Elevate and ventilate: Keep your pallet planter off the ground to avoid direct contact with moisture and prevent rotting. This will also help with proper airflow, minimizing the chances of mold and mildew growth. Avoid burying the pallet under dirt and debris, as this can trap moisture and accelerate decay.
- Inspect for rot: Before using a pallet for your planter, carefully examine it for any signs of rot. Look for soft spots, discolored areas, or crumbling wood. If you notice any of these issues, it’s best to replace the pallet to ensure the structural integrity of your planter.
- Seal and protect: Consider applying a plant-safe wood sealer to protect your pallet planter from insects, moisture, and other elements. This will help extend its lifespan and keep it looking fresh and vibrant for longer.
By following these simple steps, you can enjoy your pallet planter for several years and continue to adorn your outdoor space with beautiful plants and flowers.
How to Plant Flowers in a Pallet Planter
Planting flowers in a pallet planter is a simple and rewarding process. Here’s a step-by-step guide to help you create a beautiful pallet planter for your favorite flowers:
- Start by following the instructions to create your base planter, as mentioned in the previous sections.
- Next, select flowers that are suitable for a pallet planter. Consider the size and light requirements of each plant to ensure they will thrive in the planter.
- Arrange the selected flowers in the planter beforehand to determine the best placement. This will help you visualize the final look and ensure a balanced arrangement.
- Once you’re satisfied with the arrangement, carefully plant each flower in its designated spot, making sure to provide adequate space for growth.
If you are using a vertical pallet planter, you can enhance the visual appeal by adding additional containers like milk jugs or pails on the sides. These containers can be used to accommodate more flowers, maximizing the space and creating a dimensional display.
Remember to water your flowers regularly and provide them with the necessary care to help them thrive in the pallet planter. Enjoy the beauty and fragrance of your blooming flowers, and watch as your pallet planter becomes a stunning focal point in your outdoor space!
For further inspiration and creative pallet planter ideas, continue reading the next section.
Additional Containers
If you want to add more space and variety to your vertical pallet planter, consider attaching additional containers on the sides. These containers can be filled with flowers or trailing plants, creating a cascading effect and adding a unique touch to your planter.
| Container | Advantages |
|---|---|
| Milk Jugs | – Lightweight and easy to attach – Can be painted or decorated – Provide extra space for flowers or small plants |
| Pails | – Durable and weather-resistant – Available in various sizes and colors – Ideal for larger flowers or plants |

Experiment with different containers and flowers to create a unique and visually appealing pallet planter. The possibilities are endless!
How to Line a Pallet Planter
Before placing soil and plants in the pallet planter, it’s important to line it to prevent soil from leaking out and weeds from growing in. There are two common options for lining a pallet planter: weed fabric and plastic.
Weed Fabric
To line the pallet planter with weed fabric, follow these steps:
- Cut a piece of weed fabric slightly larger than the planter area.
- Place the fabric inside the planter, making sure it covers the entire bottom and sides.
- Staple the fabric in place along the edges, securing it to the pallet.
- Use a utility knife to cut small drainage holes in the fabric.
Once the fabric is in place, it will prevent the soil from seeping out while still allowing water to drain through the drainage holes.
Plastic
If you prefer to use plastic to line the pallet planter, follow these steps:
- Cut a piece of plastic slightly larger than the planter area.
- Place the plastic inside the planter, ensuring it covers the entire bottom and sides.
- Staple the plastic in place along the edges, securing it to the pallet.
- Use a utility knife to poke small drainage holes in the plastic.
Similar to weed fabric, plastic lining will prevent soil leakage but may not allow as much water drainage. Ensure the small drainage holes provide enough water flow for healthy plant growth.
Comparison of Weed Fabric and Plastic as Pallet Planter Liners
| Criteria | Weed Fabric | Plastic |
|---|---|---|
| Permeability | Allows for adequate water drainage | May provide less water drainage |
| Environmentally friendly | Biodegradable | Non-biodegradable |
| Cost | Generally more affordable | Low-cost |
| Longevity | May degrade over time | Durable |
Consider the pros and cons of each type of lining material to choose the option that best suits your needs.
Various Pallet Planter Ideas
When it comes to creating unique and eye-catching planters, pallets provide a multitude of options. From vertical planters to shelving units and potting benches, there is no shortage of creative ideas for repurposing pallets in your plant projects.
One way to add a pop of color and visual interest to your pallet planter is by painting or decorating the pallets. Consider using bright, vibrant colors to make a bold statement or opt for a distressed look with a touch of rustic charm. You can also stencil patterns or designs onto the pallets to create a custom look that suits your style.
For those seeking inspiration and detailed instructions for different pallet planter projects, there are numerous online resources available. Websites, blogs, and social media platforms offer a wealth of ideas and tutorials to help you bring your pallet planter visions to life. Whether you’re a novice gardener or an experienced DIY enthusiast, these resources can provide valuable guidance and tips for creating stunning pallet planters.
Vertical Pallet Planters
Vertical pallet planters are an excellent way to maximize space and showcase your favorite plants. By fixing multiple pallets together vertically, you can create a striking display that adds height and dimension to your garden or outdoor area. This design is particularly ideal for trailing plants or flowers that cascade down the pallet, creating a visually stunning vertical garden.
Shelving Units
Transforming a pallet into a shelving unit allows you to create a multifunctional space for both planting and displaying decorative items. By adding shelves between the wooden slats, you can create multiple layers for pots, planters, and other garden accessories. This design is perfect for small spaces or balconies where vertical storage is essential.
Potting Benches
Repurposing a pallet into a potting bench provides a convenient and organized workspace for your gardening activities. By attaching hooks and holders to the sides of the pallet, you can hang tools, gloves, and other gardening essentials within easy reach. The top of the pallet can serve as a work surface for potting plants or arranging flowers, making gardening tasks more efficient and enjoyable.
Benefits of Pallet Planters
Pallet planters offer several benefits. They are cost-effective and environmentally friendly, as they repurpose materials that might otherwise be discarded. By repurposing pallets into planters, you are not only reducing waste but also contributing to sustainable gardening practices.
These DIY pallet planters provide a unique and visually appealing way to display and grow plants. The rustic charm of the wooden pallets adds character to any outdoor space, creating a natural and organic look.
One of the key advantages of pallet planters is their versatility and adaptability. They can be customized to fit any space or style, whether you have a small balcony or a spacious garden. The modular design allows you to create a vertical garden, a wall-mounted planter, or even a freestanding planter, depending on your preference and available space.
With pallet planters, you have the creative freedom to experiment with different layouts, colors, and arrangements. Consider painting or staining the pallets to match your existing outdoor decor or adding decorative elements such as stencils or ornaments.
In addition, pallet planters are highly functional. The various compartments and tiers provide ample space to grow a variety of plants, including flowers, herbs, succulents, and even small vegetables. The individual compartments help to organize and separate different types of plants, creating a visually appealing and organized display.
To further inspire you, here are some creative pallet planter ideas:
- Create a hanging pallet planter by attaching hooks or chains to the top of the pallet and suspending it from a sturdy structure.
- Build a pallet planter with built-in shelves or cubbies for additional storage and display space.
- Use a pallet planter as a centerpiece for an outdoor dining table, filling it with fragrant herbs or colorful flowers.
- Design a living wall by stacking multiple pallet planters vertically, creating a stunning vertical garden.
Unlock your imagination and transform ordinary pallets into extraordinary planters with endless possibilities.

Pallet Planter Versatility
Pallet planters are highly versatile, allowing you to adapt them to your specific needs and preferences. Whether you have limited space, a specific aesthetic, or a particular plant preference, pallet planters can be customized to suit your requirements.
| Advantages | Limitations |
|---|---|
| Cost-effective | Requires occasional maintenance |
| Environmentally friendly | May have a limited lifespan |
| Unique and visually appealing | Can be heavy when filled with soil and plants |
| Versatile and adaptable | Requires some DIY skills |
| Provides organized display space | May require additional materials for stability |
Conclusion
Building a pallet planter is a fantastic DIY project that allows you to unleash your creativity and spruce up your outdoor space. With the step-by-step guide provided and the freedom to explore different ideas, you can easily transform a simple pallet into a stunning planter for your beloved plants. The process is both rewarding and enjoyable, giving you the opportunity to showcase your gardening skills and create a unique piece to enhance your outdoor decor.
By following the easy-to-understand instructions outlined in this article, you can confidently embark on your pallet planter journey. Whether you opt for a vertical planter, a tiered masterpiece, or even a hanging display, the possibilities are endless. Take the time to choose the perfect plants for your pallet planter, considering their sunlight and care requirements, as well as the overall aesthetic you want to achieve.
So, what are you waiting for? Dive into the world of DIY pallet planters and let your green thumb flourish. Embrace the joy of creating something beautiful and functional with your own hands. With a little time, effort, and the right materials, you’ll soon have a captivating pallet planter that adds a touch of natural beauty to your outdoor oasis. So go ahead, get started on your very own DIY pallet planter and enjoy the satisfaction that comes with it.

