Railway sleepers are a versatile and popular choice for creating garden borders. They add structure and rustic charm to outdoor spaces. It’s important to research and plan before starting a project to ensure the border looks as intended and remains structurally sound. Let’s explore some common landscaping projects using railway sleepers and learn how to use them effectively.
Key Takeaways
- Garden borders can be created using railway sleepers for a stylish and functional addition to any outdoor space.
- DIY garden borders with sleepers offer a cost-effective and customizable option for landscaping projects.
- Consider the design and placement of the garden border to enhance the overall aesthetic of your garden.
- Installing garden sleepers requires proper planning, preparation, and tools for a successful project.
- Raised garden beds, landscaping with sleepers, and wooden garden edging are additional creative options to explore.
Railway Sleeper Planters
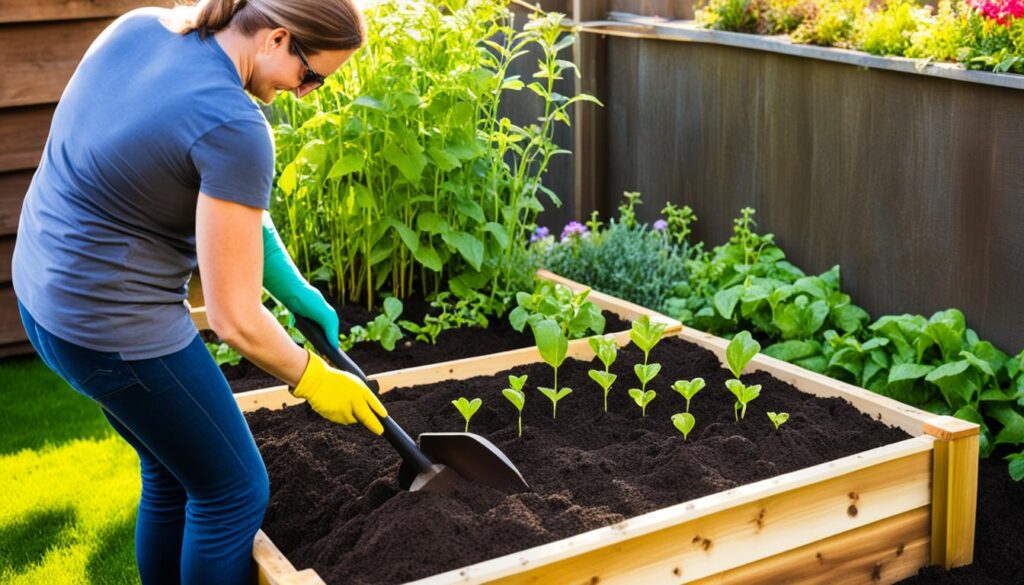
Railway sleepers are not only great for creating garden borders, but they also make excellent planters and raised beds. Their sturdy shape and strength provide the perfect foundation for containing soil and plants, giving your garden a rustic and charming look.
If you’re planning to install railway sleeper planters on a hard surface like concrete or decking, you can place them directly without any additional groundwork. However, if you want to place them on soil, it’s essential to dig a shallow trench for the first sleeper to sit in. This will help secure the sleepers and prevent them from shifting over time.
To ensure the stability of your railway sleeper planters, it’s recommended to overlap the sleepers and fix them together using timber screws and metal plates. This will create a solid structure that can withstand the weight of soils and plants, giving you peace of mind.
By using railway sleepers for your planters, you not only add functionality to your garden but also create a distinctive feature that adds character to your outdoor space.
Benefits of Railway Sleeper Planters:
- Strong and durable construction
- Provides a rustic and charming look to your garden
- Easily customizable and adaptable to any garden style
- Allows you to grow various plants, flowers, or even vegetables
- Flexible placement options on both hard surfaces and soil
- Long-lasting and low maintenance
Tips for Building Railway Sleeper Planters:
- Measure and plan the size and layout of your planters before starting the installation process.
- Ensure the area where you’re placing the planters is level and free from any obstructions.
- If required, use a spirit level to check the alignment of the sleepers and make adjustments as needed.
- Choose high-quality timber screws and metal plates for securing the sleepers together.
- Consider treating the sleepers with a wood preservative to protect them from moisture and prolong their lifespan.
- Select appropriate plants that suit the size and conditions of your railway sleeper planters.
With railway sleeper planters, you can add style and functionality to your garden, creating a unique and beautiful space to enjoy.
Railway Sleeper Edging
Sleepers can be a fantastic choice for creating edging for lawns and borders. They add a touch of rustic beauty to your outdoor space while providing a durable and long-lasting boundary. Whether you want a defined edge for your lawn or border, using sleepers as edging can enhance the overall look of your garden.
When installing sleepers as edging, it’s important to work with straight edges and ensure that the ground is flat. This will help create a clean and cohesive look for your garden border. The process of installing sleepers as edging is similar to building planters.
Here’s a step-by-step guide to installing sleepers as edging:
- Start by digging a trench along the edge of your lawn or border. The trench should be deep enough to accommodate the height of the sleepers.
- Once the trench is dug, lay a base of mortar or sand to provide stability for the sleepers.
- Place the sleepers in the trench, ensuring they are level and aligned with each other.
- If you’re using more than one sleeper, you can fix them together using timber screws or metal plates for added stability.
- After the sleepers are in place, backfill the trench with soil or gravel, ensuring it is firmly packed around the sleepers.
Unlike other landscaping projects, fixing the sleepers together may not be necessary for edging projects. However, it’s important to ensure that the sleepers are securely placed in the trench to prevent shifting or movement over time.
By using sleepers as edging, you can create a defined and polished look for your lawn or border. The natural texture and charm of the sleepers will add character to your outdoor space, making it a focal point of your garden.
Benefits of Railway Sleeper Edging:
- Provides a visually appealing and rustic border for your lawn or garden
- Enhances the overall aesthetics of your outdoor space
- Durable and long-lasting, requiring minimal maintenance
- Creates a defined and tidy edge for your lawn or border
- Can be easily installed with basic DIY skills
So why not consider using sleepers as edging for your garden? The versatility and timeless appeal of railway sleepers make them an excellent choice for creating stunning borders that will stand the test of time.


Railway Sleeper Retaining Walls, Terraces & Steps
When it comes to creating durable and visually appealing outdoor features, railway sleepers are a fantastic choice. They offer the perfect combination of strength and rustic charm for projects such as retaining walls, terraces, and steps. In this section, I’ll provide you with some essential tips for successfully constructing these features using railway sleepers.
Retaining Walls with Sleepers
Retaining walls are used to hold back soil and prevent erosion in sloped areas. Railway sleepers are an excellent material for constructing retaining walls due to their durability and ability to withstand heavy loads.
To build a railway sleeper retaining wall, here are the key steps:
- Start by preparing a firm and level base for the wall.
- Position the sleepers horizontally, ensuring each one is securely in place.
- Use wooden stakes to provide additional support and stability to the sleepers.
- If your wall is taller than one sleeper high, consider adding drainage behind the wall to prevent water buildup.
By following these steps, you can create a sturdy and functional railway sleeper retaining wall that will enhance the appearance and functionality of your outdoor space.
Terraces with Sleepers
Railway sleeper terraces are a fantastic way to add levels to your garden or outdoor area. They provide defined spaces for planting and create a visually striking landscape element.
Here’s how you can construct a terrace using railway sleepers:
- Determine the desired height and length of your terrace.
- Prepare a level base for the sleepers to sit on.
- Position the sleepers horizontally and secure them in place using wooden stakes.
- Consider adding decorative aggregates between each level to add visual interest.
With these steps, you can transform a sloped area into a stunning and functional terrace using railway sleepers as your building material.
Steps with Sleepers
Adding steps to your outdoor space can improve accessibility and create a focal point. Railway sleepers are an ideal choice for constructing robust and visually appealing steps.
Here’s how to build steps using railway sleepers:
- Determine the desired height and depth of each step.
- Prepare a level base for the first sleeper to sit on.
- Position the sleepers vertically to form the risers and horizontally for the treads.
- Secure each step in place using wooden stakes or metal brackets.
- Consider adding decorative aggregates between each step to enhance the visual appeal.
By following these steps, you can create not only functional but also visually stunning steps using railway sleepers.
Incorporating railway sleepers into your outdoor projects for retaining walls, terraces, and steps requires careful planning and attention to detail. They offer durability, strength, and a rustic charm that can transform any outdoor space. With the use of concrete for added stability and wooden stakes for support, you can ensure that your railway sleeper projects remain structurally sound and visually appealing.


| Features | Benefits |
|---|---|
| Strength and durability of railway sleepers | Long-lasting outdoor features |
| Rustic charm and visual appeal | Enhances the aesthetics of outdoor spaces |
| Ability to withstand heavy loads | Creates sturdy and functional retaining walls |
| Defined spaces for planting in terraces | Provides opportunities for landscaping and gardening |
| Improved accessibility with steps | Facilitates movement in sloped areas |
How to Build a Rectangle Raised Bed with Sleepers
Building a raised bed with sleepers is a popular choice for gardeners looking to create a practical and visually appealing feature in their outdoor space. With the right planning and execution, you can construct a rectangular raised bed that not only adds structure to your garden but also provides an ideal environment for healthy plant growth.
Selecting the Size and Positioning
The first step in building a raised bed with sleepers is to determine the desired size and position. Measure out the area where you want to install the bed and mark the corners. Keep in mind that a rectangular shape is best for efficient use of space and easy maintenance.
Attaching the Sleepers
Once you have marked the corners, position the sleepers along the edges of the bed. Overlapping the sleepers creates stability and prevents soil from spilling out. Secure the sleepers together using timber screws or brackets. Make sure to use rust-resistant screws or galvanized brackets to ensure the longevity of your raised bed.
Adding Height and Stability
If you want to increase the height of your raised bed, you can add additional layers of sleepers. Make sure to overlap each layer and secure them together. This not only adds stability but also creates a visually appealing design.
Enhancing Drainage
Proper drainage is essential for the health of your plants. To improve drainage in your raised bed, consider placing bricks or stones at the bottom before adding soil. This creates a space for excess water to flow away, preventing waterlogging and root rot.


Building a rectangular raised bed with sleepers is a rewarding DIY project that adds both functionality and aesthetics to your garden. By following these steps, you can create a durable and attractive raised bed that will be the perfect home for your plants.
Choosing the Right Timber Sleepers for Your Raised Garden Bed
When it comes to selecting timber sleepers for your raised garden bed, there are several options to consider. The choice you make will depend on both the aesthetic you desire and the functionality you require for your garden project.
Here are some types of sleepers that you can choose from:
- Reclaimed Railway Sleepers: These sleepers have a rustic charm and are perfect for creating a weathered, vintage look in your garden.
- Sawn Green Treated Incised FSC Sleepers: These sleepers are treated to ensure durability and resistance to rot. They are suitable for both contemporary and traditional garden designs.
- Sawn Green Treated 1st Grade FSC Sleepers: These sleepers are made from high-quality timber and have a smooth finish. They are ideal if you want a sleek and modern appearance for your raised garden bed.
I recommend using new timber sleepers that match other garden products you have, as this will create a cohesive and harmonious look in your outdoor space. Additionally, make sure to choose sleepers that come with a guarantee to ensure their quality and longevity.
Before making a final decision, consider the following factors:
- The overall style and theme of your garden
- The level of maintenance you are willing to commit to
- The type of plants you intend to grow in your raised bed
- Your personal preference for the appearance and texture of the timber
Remember, the right choice of timber sleepers will not only enhance the aesthetics of your raised garden bed but also provide a sturdy and durable foundation for your plants to thrive.
Comparison of Timber Sleepers
| Sleeper Type | Appearance | Durability | Price Range |
|---|---|---|---|
| Reclaimed Railway Sleepers | Rustic and weathered | Varies (dependant on age and condition) | ££ |
| Sawn Green Treated Incised FSC Sleepers | Can be stained or painted | High | ££-£££ |
| Sawn Green Treated 1st Grade FSC Sleepers | Smooth and modern | High | £££ |
How to Lay Garden Sleepers
Proper preparation is crucial when laying garden sleepers. To ensure a successful installation, it is important to follow these steps:
- Clear the Area: Before laying the sleepers, clear the area of vegetation and debris. This will provide a clean surface and prevent any interference with the installation process.
- Choose the Right Sleepers: There are different types of garden sleepers available, such as sawn green treated incised FSC sleepers and sawn green treated 1st grade FSC sleepers. Select the type that best suits your landscaping needs and preferences.
- Set the Sleepers: Depending on the desired outcome, sleepers can be set in concrete or pinned into position using wooden posts or stakes. This will provide stability and prevent any movement over time.
- Level the Ground: It is important to ensure that the ground is level before laying the sleepers. This can be achieved by removing any bumps or uneven areas and using a spirit level or string line as a guide.
- Ensure Stability: To prevent shifting or sagging, it is essential to ensure that the sleepers are properly supported and secured. This can be done by using additional stakes or supports where necessary.
By following these steps, you can lay garden sleepers with confidence, creating a beautiful and durable landscaping feature for your outdoor space.
“Proper preparation is crucial when laying garden sleepers. By clearing the area, choosing the right sleepers, setting them correctly, leveling the ground, and ensuring stability, you can create a sturdy and visually appealing landscape feature for your garden.” – SleepersLandscaping.com
Getting the Foundations Right
When it comes to installing sleepers for your garden project, establishing strong foundations is essential. By taking the time to prepare the ground properly, you can ensure the longevity and stability of your sleepers. Here are some crucial steps to get the foundations right:
- Dig a shallow trench: Start by digging a shallow trench along the path where the sleepers will be placed. This trench will provide a secure base for the sleepers and prevent them from shifting.
- Level the ground: Use a spirit level to ensure that the ground is level along the entire length of the trench. This will ensure that the sleepers sit flush and create a smooth and even surface.
- Stabilize with concrete: To further enhance the stability of the sleepers, consider using concrete. Pour a layer of concrete in the trench and use a trowel to smooth it out. This will provide a solid base for the sleepers to rest on.
- Waterproof layer: To protect the sleepers from water damage, it’s advisable to apply a waterproof layer. This can be done by using a waterproof sealant or a layer of plastic sheeting beneath the sleepers.
- Add additional stability: Depending on the project, you may need to secure the sleepers further. This can be achieved by pinning the sleepers into position using wooden posts or stakes. Alternatively, you can use metal corner plates and braces to reinforce the structure.
By following these steps and establishing solid foundations, you can ensure that your sleepers will remain sturdy and functional for years to come. Now that the foundations are in place, you can move on to the exciting part of bringing your garden project to life.
Tools and Finishing Touches
When it comes to installing garden sleepers, having the right tools is essential. Here are some basic tools you’ll need to get the job done:
- Shovels
- Spirit levels
- Power tools
These tools will help you prepare the ground and ensure the sleepers are level and secure. Once the sleepers are in place, there are a few finishing touches you can add to enhance their appearance and longevity.
To give your garden sleepers a professional look, you can use a hand sander to smooth out any rough edges or imperfections. This will create a clean and polished finish.
Additionally, applying a wood stain to the sleepers can greatly enhance their appearance and provide protection against the elements. A wood stain not only adds color to the sleepers but also helps to preserve and prolong their lifespan. Choose a stain that complements your garden design and apply it according to the manufacturer’s instructions.
Maintaining and Preserving Sleepers
Maintaining your garden sleepers is important to ensure their longevity and keep them looking their best. Here are a few tips to help you preserve your sleepers:
- Regularly inspect the sleepers for any signs of damage or decay. If you notice any issues, address them promptly to prevent further deterioration.
- Keep the sleepers clean by removing any debris or dirt that may accumulate on the surface. This can be done using a stiff brush or a pressure washer on a low setting.
- Apply a protective coating, such as a wood preservative or sealant, to help prevent rot and insect damage. This should be done periodically, following the manufacturer’s instructions.
- Consider applying a weed killer or weed membrane along the base of the sleepers to prevent weeds from sprouting through.
By taking these steps to maintain and preserve your sleepers, you can ensure they remain in good condition and continue to enhance your garden for years to come.
| Tool | Description |
|---|---|
| Shovels | Used for digging the ground and creating a base for the sleepers. |
| Spirit levels | Indispensable for ensuring the sleepers are level and align perfectly. |
| Power tools | Includes drills, saws, and impact drivers which facilitate cutting and fixing sleepers. |
Conclusion
Building a garden border with sleepers is a fantastic way to add both functionality and beauty to your outdoor space. Whether you’re looking to create raised beds, define edges, or construct retaining walls, sleepers provide endless possibilities for landscaping projects.
To ensure success, careful planning, preparation, and installation are crucial. Take the time to choose the right timber sleepers that match your desired aesthetic and are built to last. Use the appropriate tools and techniques for proper placement and stability.
With a dash of creativity and attention to detail, sleepers can be transformed into stunning garden borders that enhance the overall design of your landscape. Whether you’re a seasoned gardener or a DIY enthusiast, using sleepers can elevate your garden to new heights.
So, go ahead and get started on your next project. Embrace the versatility of sleepers and unleash your imagination to create a garden border that is both functional and visually appealing. With these tips in mind, you’ll be well on your way to a stunning garden that will be the envy of all your neighbors.


