Learning how to make garden stepping stones is an easy and cost-effective way to create a charming garden pathway. There are various methods and materials you can use, such as concrete, pavers, or logs. Stepping stones offer both aesthetic appeal and practical benefits, including reducing dirt tracking, protecting grass from foot traffic, and providing hardscape elements for attracting butterflies. When making garden stepping stones, you can exercise your creativity by adding stains or mosaics. With the right materials and techniques, you can personalize your outdoor space and enhance your landscaping projects.
Key Takeaways:
- Making garden stepping stones is an easy and affordable way to create a charming garden pathway.
- There are various materials you can use, such as concrete, pavers, or logs, allowing you to exercise your creativity.
- Stepping stones offer both aesthetic appeal and practical benefits, including reducing dirt tracking and protecting grass.
- You can personalize your stepping stones with stains, mosaics, or other decorative elements.
- By following the right techniques, you can enhance your outdoor space and add a personal touch to your landscaping projects.
Materials and Tools Needed for Making Stepping Stones
In order to create your own homemade stepping stones, you will need a selection of materials and tools. With these essentials, you can bring your garden pathway ideas to life. Here’s a list of what you’ll need:
| Materials | Tools |
|---|---|
| Stepping stone molds | Wheelbarrow or tub for mixing |
| Dry concrete mix | Shovel |
| Vaseline or cooking spray | Screed (2×4 board or similar) |
| Concrete coloring agent or decorations | Chicken-wire fencing (optional) |
| Sand | Protective eyewear |
| Gloves | |
| Face mask | |
| Spade | |
| Rubber mallet | |
These materials and tools will serve as your stepping stone molds, assisting you in bringing your garden pathway ideas to life. Whether you choose commercial molds or decide to get creative with improvised molds, these essential tools will ensure you have the shape and design you desire.
“I am excited to share with you the materials and tools you’ll need to create your own homemade stepping stones. With these essentials, you can transform your garden into a beautiful and personalized oasis.” – Justin Green
Choosing and Preparing the Concrete
The type of concrete you use is essential for creating beautiful and durable homemade garden stepping stones. To achieve a smoother and more decorative finish, it is recommended to use a finer concrete mix without large gravel pieces. This will give your stepping stones a polished look that complements your garden.
There are two options for obtaining the concrete: purchasing ready-made concrete or mixing your own. If you have a larger project or want more control over the consistency and quantity of the concrete, mixing your own is a great choice. This allows you to customize the concrete to meet your specific needs.
When preparing the concrete, aim for a wet sand consistency that clumps together without crumbling or spilling. This balance is crucial to ensure that the concrete is easy to work with and can be shaped to your desired form. Take your time to achieve the perfect consistency before moving on to the next step.
By choosing and preparing the right concrete, you can create personalized stepping stones that add character and charm to your garden pathway.
Key Tips:
- Use a finer concrete mix without large gravel pieces for a smoother finish.
- If possible, mix your own concrete to have more control over the consistency and quantity.
- Ensure the concrete has a wet sand consistency that clumps together without crumbling or spilling.
| Pros | Cons |
|---|---|
| Customizable to your needs | Requires time and effort to mix your own concrete |
| Smoother and more decorative finish | Finer concrete mix may be more expensive |
| Allows for unique and personalized stepping stones | Choosing the right consistency may require practice |
“Choosing the right concrete is crucial for achieving the desired look and durability of your homemade garden stepping stones. Take the time to find the perfect mix that suits your project and enjoy the process of creating personalized stepping stones that add beauty and character to your outdoor space.”
Creating the Stepping Stones with Molds
Using molds is a popular method for creating personalized stepping stones. To ensure easy removal of the finished stepping stones, grease the inside of the mold with Vaseline or cooking spray.
You have a variety of options when it comes to choosing molds. You can use commercial molds specifically designed for stepping stones, or you can get creative and use everyday objects like cake pans or pie pans. The choice is yours!
If you want to expedite the process and make multiple stepping stones at once, it’s recommended to use more than one mold. This way, you can pour and set the concrete simultaneously.
When pouring the mixed concrete into the molds, make sure to tamp it down to remove any air bubbles. This will ensure a sturdy and durable finished product. Use a screed to remove any excess concrete and create a smooth and level surface.
Now comes the fun part – adding personal touches and design elements! You can embed decorative elements like mosaic tiles, glass gems, or stones into the concrete. Alternatively, you can make handprints or create patterns with different colored concrete. Let your creativity flow!
After pouring and decorating the concrete, allow the stepping stones to dry for a few days. Make sure they’re fully dry before proceeding to the next step.
Once the stepping stones are dry, gently remove the molds. Be careful not to damage the edges or any decorations. Let the concrete finish curing before subjecting the stepping stones to heavy use.
Quote:
“Using molds for creating stepping stones is a fantastic way to express your creativity and add a personal touch to your garden pathway.” – Gardening enthusiast
Now you have a beautiful set of personalized stepping stones ready to enhance your outdoor space. Let’s move on to other creative ideas for garden pathways.
| Pros | Cons |
|---|---|
| Easy to create unique designs | May require additional time for drying and curing |
| Allows for customization and personalization | Slightly more complex process compared to other methods |
| Offers endless design possibilities | Requires careful handling and removal of molds |


Next, we’ll explore alternative methods and creative ideas for stepping stones, including using logs or pavers.
Using Logs or Pavers for Garden Stepping Stones
In addition to using concrete, you can also make garden stepping stones from logs or pavers. Logs can be cut into medallions, while pavers offer a convenient and ready-to-use option. Logs provide a natural and rustic look, adding charm to your outdoor space. On the other hand, pavers offer durability and a wide variety of design options. However, it’s important to consider the climate and cost implications when choosing between the two.
Logs as Garden Stepping Stones
Logs can be a unique and eco-friendly choice for creating garden stepping stones. By cutting logs into medallions, you can showcase the natural beauty of the wood and create a distinct pathway. However, it’s crucial to consider the climate in your area before using logs. In damp climates, wood can rot over time, reducing the lifespan of your stepping stones. Proper sealing and maintenance are necessary to ensure their durability.
Pavers as Garden Stepping Stones
Pavers offer a convenient and versatile option for garden stepping stones. They are available in various shapes, sizes, and colors, allowing you to create a personalized pathway that complements your overall landscaping design. Pavers are typically made of concrete or natural stone, providing durability and resistance to weather conditions. However, they can be more expensive compared to other materials, such as concrete or logs.
The Pros and Cons
When deciding between logs and pavers for your garden stepping stones, it’s essential to weigh the pros and cons. Here’s a comparison:
| Logs | Pavers |
|---|---|
| Unique and natural look | Wide variety of design options |
| Eco-friendly | Durable and weather-resistant |
| Potential for rot in damp climates | Higher cost compared to other materials |
Ultimately, the choice between using logs or pavers for your garden stepping stones depends on your personal preferences, budget, and the specific requirements of your outdoor space. Both options can enhance the aesthetic appeal and functionality of your garden pathway, providing an inviting and visually pleasing experience.


Designing and Planning Your Garden Pathway
Designing and planning your garden pathway is an important step in creating a visually appealing and functional addition to your outdoor space. Consider the layout and style of your garden, as well as the intended use of the pathway, to ensure it complements your overall garden design. Whether you’re looking for garden pathway ideas or creative garden décor, careful planning will help you achieve the desired result.
When designing your garden pathway, think about the most convenient locations for the path and how it will connect different areas of your garden. Determine whether you want a straight or winding path, taking into consideration the available space and the flow of foot traffic. You can also choose between an informal or formal design, depending on the overall aesthetic you want to achieve.
To visualize the pathway’s shape and placement, you can use old garden hoses or stakes and string. This will allow you to experiment with different paths and make adjustments before committing to a final layout. As you plan the distance between each stepping stone, consider the average human stride to ensure a comfortable walking experience.
Pros and Cons of Different Garden Pathway Designs
| Garden Pathway Design | Pros | Cons |
|---|---|---|
| Straight Pathway |
|
|
| Winding Pathway |
|
|
| Informal Pathway |
|
|
| Formal Pathway |
|
|
By considering these garden pathway ideas and creative garden decor options, you can design a pathway that suits your style and enhances the overall beauty of your garden. Whether you choose a straight or winding path, informal or formal design, the key is to create a visually appealing and functional pathway that complements your outdoor space.


Installing the Garden Stepping Stones
Now that you’ve created your garden stepping stones, it’s time to install them and bring your garden pathway ideas to life. The installation process is simple and straightforward, ensuring that your stepping stones are securely placed along the planned pathway.
- Prepare the area: Begin by digging shallow holes in the soil or mulch to accommodate the thickness of the stepping stones. Ensure that the holes are level with the ground to create a seamless and stable pathway.
- Use sand as a base: Place a layer of sand at the bottom of each hole. This will provide stability for the stepping stones and help with drainage, preventing water buildup.
- Position the stepping stones: Gently place the stepping stones on top of the sand, ensuring that they fit snugly in the holes. Use a rubber mallet to gently tap them down and secure them in place.
- Make adjustments: Over time, settling or shifting may occur, causing the stepping stones to become uneven. Regularly check and adjust the stones as needed, ensuring that they maintain their level position and functionality.
- Alternative installation methods: Stepping stones can also be installed on existing pathways or used as decorative elements by propping them upright against a wall or incorporating them into garden features.
Remember, the goal is to create a durable and visually appealing garden pathway that enhances your overall garden design. By properly installing the garden stepping stones, you can achieve just that.
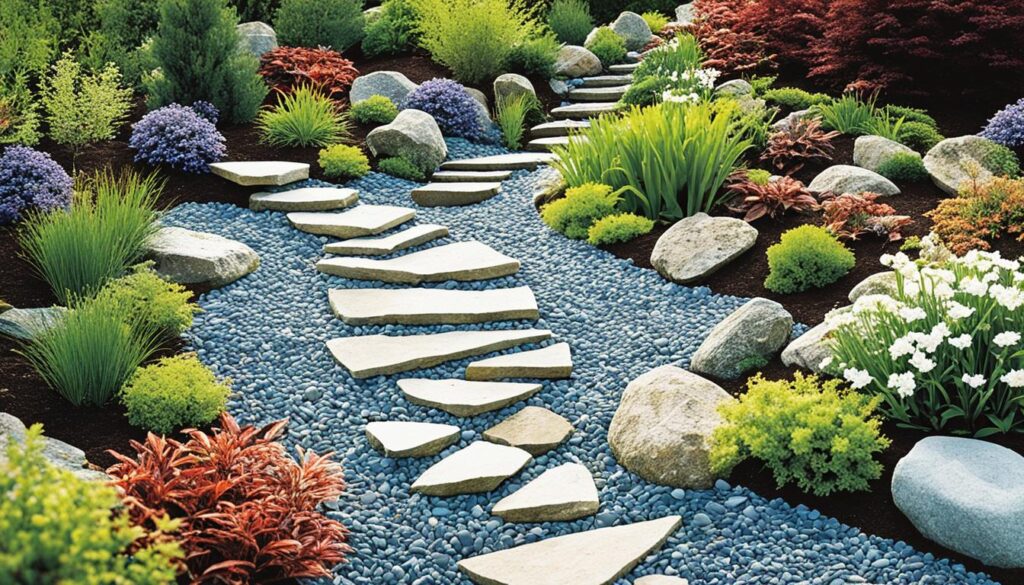
Take a look at the example below to see how installing garden stepping stones can transform your outdoor space.
Alternative Methods and Creative Ideas for Stepping Stones
While concrete, logs, and pavers are commonly used materials for garden stepping stones, there are alternative methods and creative ideas you can explore to add a unique touch to your garden pathway. Straying from traditional materials allows you to infuse your outdoor space with creativity and individuality.
1. Mosaic Magic:
Consider incorporating mosaic tiles, broken pottery, glass gems, seashells, or pretty stones into your stepping stone designs. Arrange these materials in beautiful patterns or create eye-catching designs to make a statement in your garden. The vibrant colors and textures will add an artistic flair to your pathway.
2. Personal Touch:
Add a personal touch to your stepping stones by incorporating monograms or initials. You can also choose store-bought molds with specific shapes or patterns that resonate with your style and preferences. These personalized stepping stones will create a truly unique and meaningful garden pathway.
3. Nature-Inspired:
Get creative by using large leaves as molds for your stepping stones. Pour concrete onto the leaves and create leaf-shaped stepping stones with embedded vein patterns. This natural design element will blend seamlessly with your garden surroundings and bring a touch of organic beauty to your pathway.
“Creativity is allowing yourself to make mistakes. Design is knowing which ones to keep.” – Scott Adams
By exploring alternative methods and incorporating creative ideas into your garden pathway, you can elevate your stepping stone designs beyond the ordinary. Let your imagination run free and experiment with different materials, patterns, and shapes to create a visually stunning and one-of-a-kind garden décor.
Continue reading to discover how to maintain and enhance your stepping stone pathway for long-lasting beauty and functionality.
Maintaining and Enhancing Your Stepping Stone Pathway
Once your stepping stone pathway is installed, it is important to maintain and enhance its appearance and functionality. Regularly clean and inspect the stepping stones for any signs of damage or wear. Repair any cracks or chips using aggregate-free cement. To keep the stepping stones looking fresh and protected, consider varnishing the decorative part with a high-quality outdoor or marine varnish. This will provide a glossy finish and help prolong the lifespan of the stepping stones. By properly maintaining and enhancing your stepping stone pathway, you can enjoy its beauty and functionality for years to come.
Conclusion
Creating your own stepping stones for garden pathways is a rewarding and enjoyable DIY project. Whether using concrete, logs, or pavers, stepping stones offer numerous benefits, including aesthetic appeal, practicality, and personalization. By following the proper techniques and utilizing creative ideas, you can design and construct a unique pathway that adds charm and character to your outdoor space.
When making stepping stones, remember to consider the materials, design, and installation methods that best suit your individual preferences and needs. With a little creativity and dedication, you can create beautiful stepping stones that enhance the overall beauty and functionality of your garden.
So, why not embark on this exciting journey of creating your own garden pathway? Embrace the DIY spirit and let your imagination run wild. Get started today, and transform your outdoor space into a picturesque haven with the charm of stepping stones!


